Canvas courses are automatically generated each semester through an integration with the University Registrar system. Every Canvas course includes at least one Section. All enrollments – students, instructors, admin assistants, TA’s, etc. are enrolled in a section. Usually, a section corresponds to a specific class, for example, LEC001. These sections can be viewed at the Sections tab on the Settings page.
A Canvas course can include multiple sections — lectures, discussions, and labs. Some courses that include graduate and undergraduate classes are combined. In order for faculty to be able to identify different class levels, differentiated class sections will be created. The new sections will include UG for all undergraduate enrollments, GR for all graduate student enrollments, as well as an ALL section that includes graduate and undergraduate enrollments. The instructor and instructional support staff are also added to each of these sections.
To follow FERPA guidelines, all teachers, TAs, students, course admins, etc. are restricted to interact only within the section in which they are enrolled (e.g. TAs can see all sections, but when they select a section in which they are not enrolled, they won’t be able to see the students or their submissions).

Differentiating Course Content by Section
Other Section Features
The following instructions will explain how to distribute such Canvas activities as Announcements, Discussions, Assignments, and Quizzes by sections. If you do not need to assign activities to different sections, you can leave those assigned to Everyone or All Sections in the class as specified by default.
Distributing Assignments or Quizzes by Sections
- Depending on the item that needs to be distributed by sections, click Assignments or Quizzes in Course Navigation.
- Scroll down to the Assign to field and type in or select the section(s) to which the assignment/quiz should be distributed. Add a Due Date and/or Availability Dates if needed.
- Click the +Add button if you want to assign different Due Dates/Availability Dates to other sections.
- Click the Save button to save the assignment/quiz as a draft; click Save & Publish to make the assignment/quiz available to students.

Distributing Announcements or Discussions by Sections
- Depending on the item that needs to be distributed by sections, click Announcements or Discussions in Course Navigation.
- Access the editing mode of an announcement or a discussion that needs to be distributed by sections.
- Scroll down to the Post to field, click on the dropdown, and select the enrollment sections that need to receive the announcement or take part in the discussion.
- Click the Save & Publish or Save button at the bottom right of the page.

Sections can also be used to filter the Gradebook, differentiating TA access to students, and communicating with students through Canvas.
Sorting Canvas Gradebook by Sections
- Click on Grades in Course Navigation.
- Select the View option and choose Filters > Sections.
- Select the section in the dropdown menu in the upper right corner.

Manually Adding Teaching Assistants to Sections in Canvas
To follow FERPA guidelines, if TAs have been assigned to specific sections through the Registrar, they have been enrolled to interact within those sections only. If you need to manually enroll TAs in other sections, follow these steps:
- Click on People in Course Navigation.
- Click the +People button at the top right.
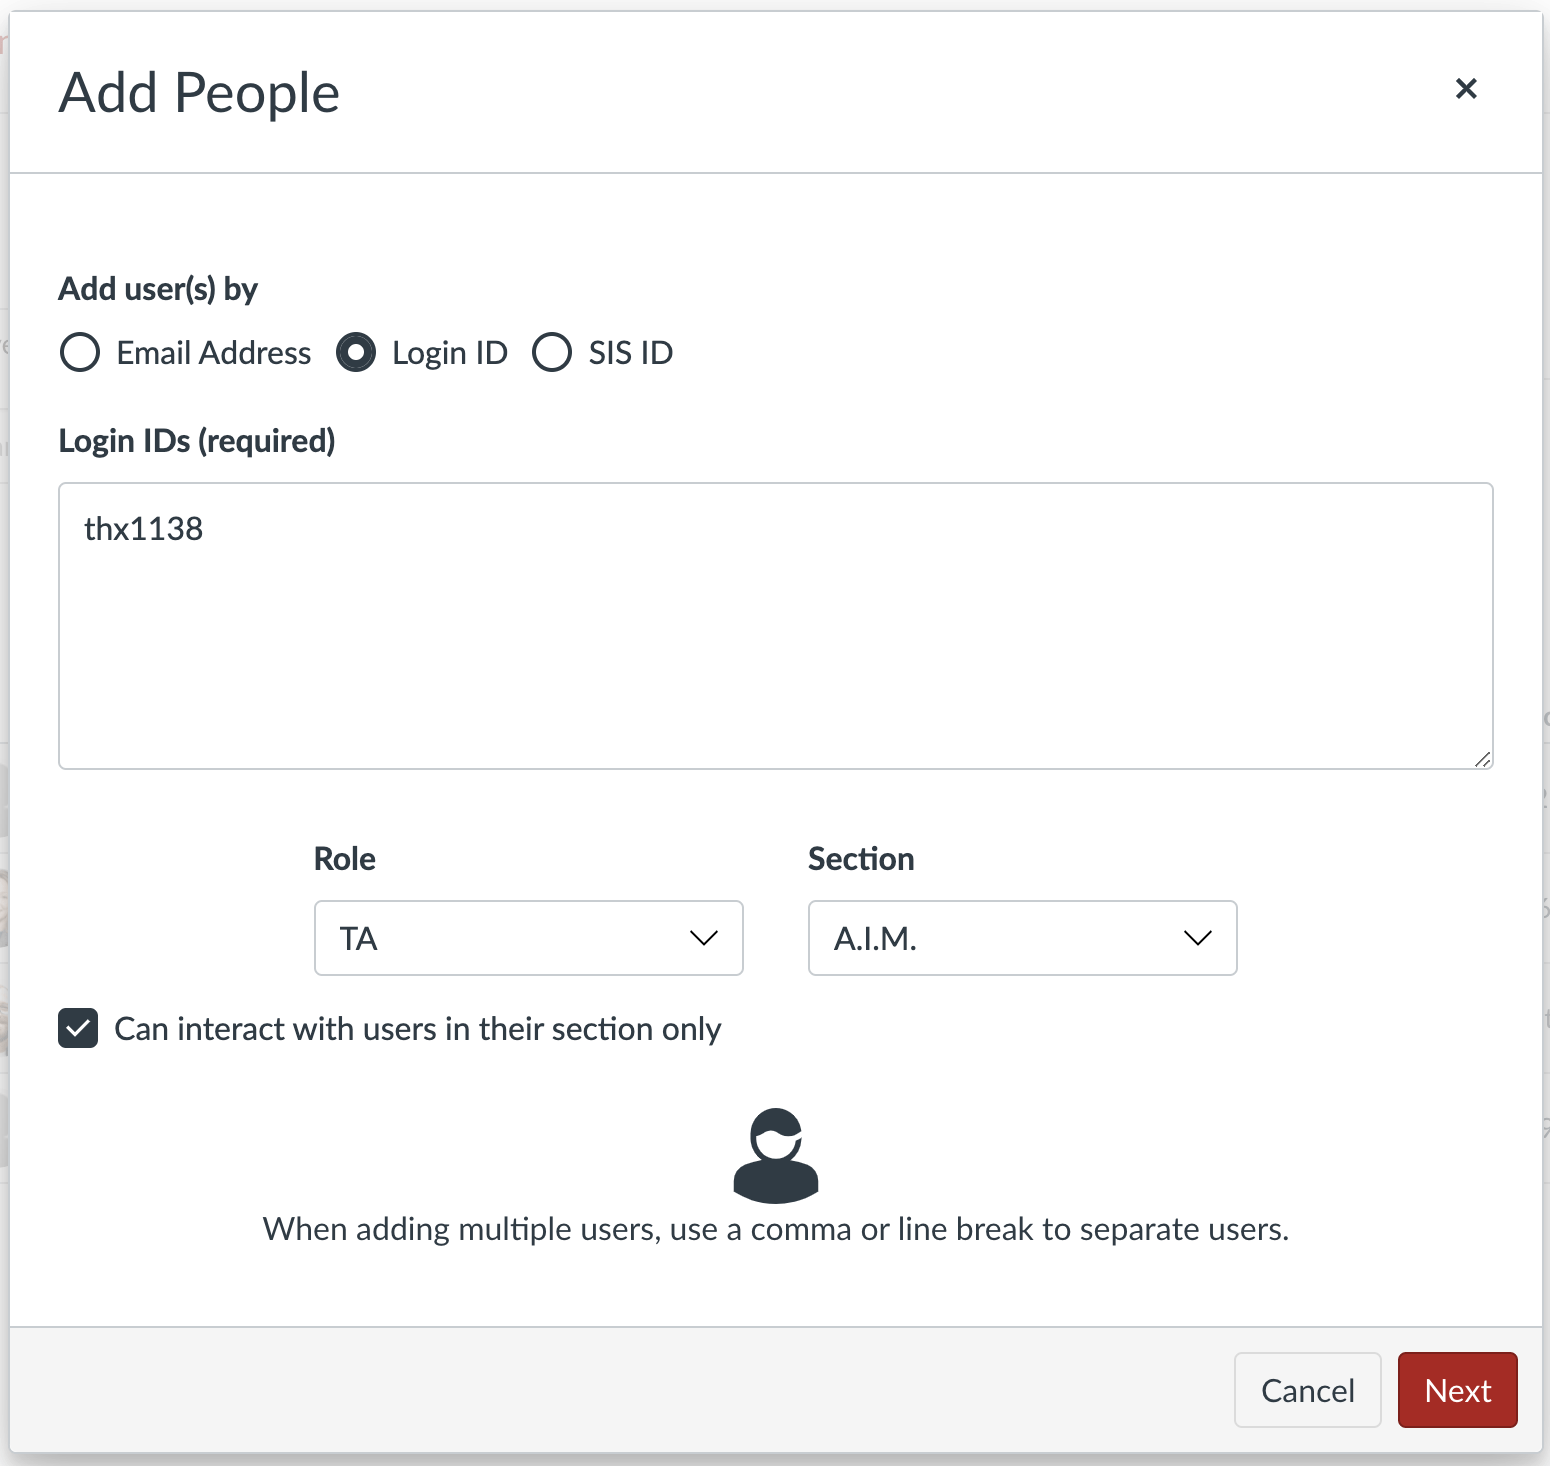
- Select Login ID in the pop-up window and enter the TA’s NetID in the center box.
- Select the TA role in the drop-down menu, select the sections the TA should be assigned to, and if needed, check the box Can interact with users in their section only.
- Click the Next button, and select the Add Users option in the next pop-up window.
Emailing to Course Sections in Canvas
- Click Inbox in Global Navigation.
- To create a new message, click the Compose a New Message icon
 at the top center.
 - In the Course dropdown, select the course that you are sending the message to.
- Click on the Contact List icon
 , select Course Sections, and choose the sections you are sending the message to.
 - Enter the subject and type in the message.
- If you want to send a message as a blind copy (bcc), select the check the Send an individual message to each recipient box under the subject line.
This option is enforced if there will be more than 100 recipients. Separate email threads will automatically be generated for each recipient. To avoid this situation, we recommend
sending emails to individual sections (given sections are kept under 100 students). If an individual section exceeds the 100-student limit, the workaround is to create student groups in Canvas and send messages to those groups. - Click the Send button at the lower right.

