
Zoom allows you to meet your students online when you can’t meet in person, and record lectures that you can save to the cloud and display in Canvas or record to your computer and later upload to Canvas using Panopto. In addition you can host one-on-one meetings for online office hours, engage with multiple students for study sections, or even hold classes with up to 300 students (or 500 students for larger courses after contacting IT@Cornell ).
Follow the instructions on this page to get Zoom meetings scheduled through your Canvas course space. For more information on Zoom and information for using Zoom separate of Canvas, see CIT’s Zoom documentation.
To enable Zoom in your Canvas course, see How do I manage Course Navigation links?
Setting up a Zoom Meeting in Canvas
Recording a Zoom Meeting to Canvas
Running a Zoom Meeting in Canvas
- Within your course, click the Zoom link in the Course Navigation menu on the left.
- Click the Schedule a New Meeting button on the top right.
- Enter a clear, descriptive Topic for the meeting, add a description, schedule the meeting time and length, choose settings for the meeting, and click the Save button.
![]()
Check Only authenticated users can join meetings to maintain meeting security and not allow AI bots or unauthorized people to join your sessions. Note that you may also choose to enable the Waiting room for an additional level of security.
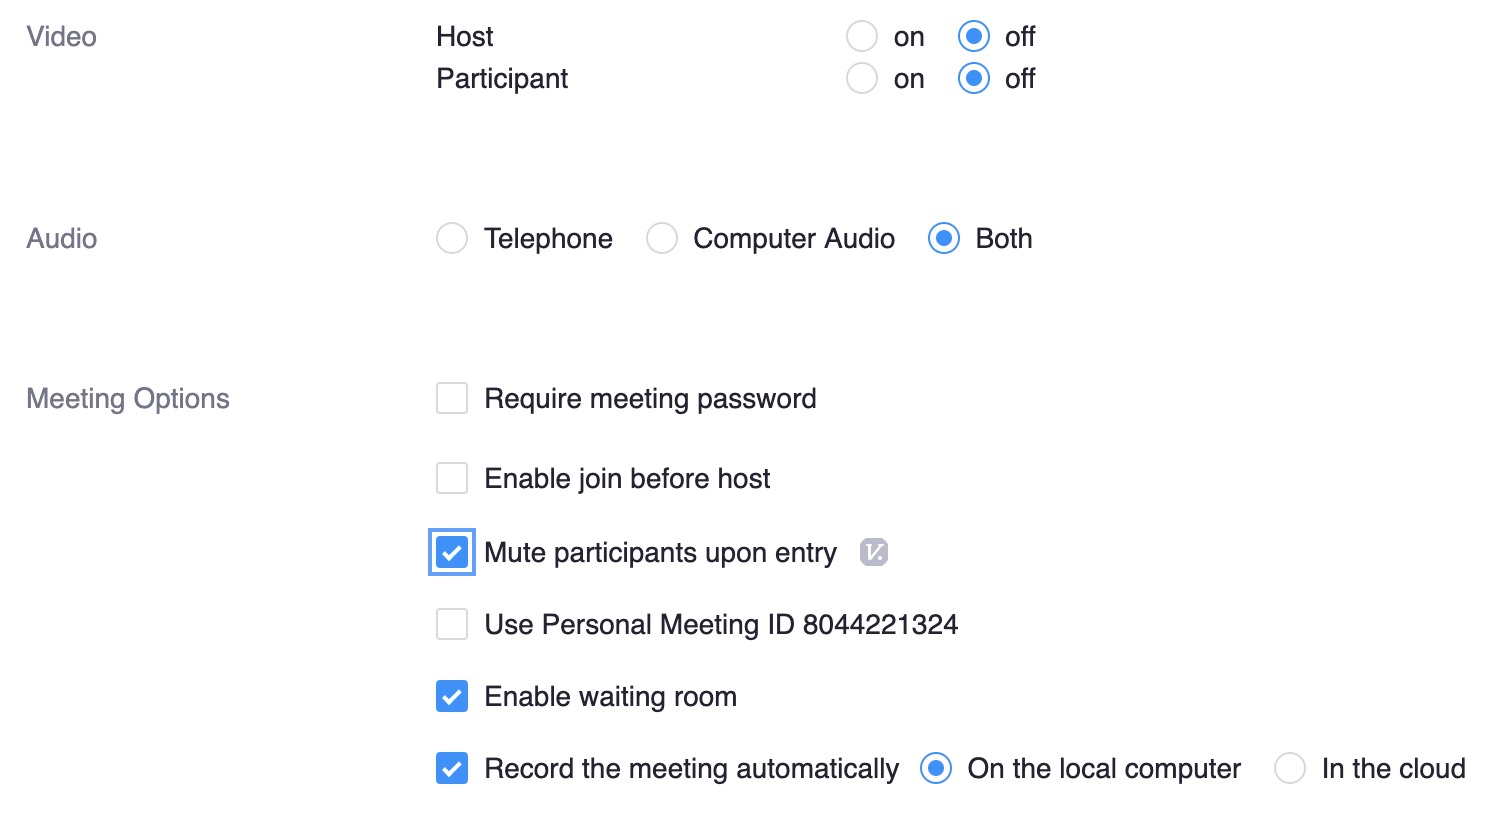
Set Host and Participant video to off and check the box next to Mute participants upon entry to increase student privacy and limit distractions.
Set up a separate recurring meeting to use during the add/drop period to better secure your post-add/drop meetings.
When recording with Zoom through Canvas, you have two options in the Meeting Options area of the settings for where to record: On the local computer or In the cloud.
Recordings saved on a local computer should be shared via Panopto in a course.
Recordings saved in the cloud are available in both the Zoom cloud and on Cornell’s Video on Demand (VOD). The recordings in each tool are not linked past the initial recording session.
| Saved on a local computer | Saved In the cloud Zoom Cloud | Saved In the cloud Cornell VOD |
|
|---|---|---|---|
| Need to be shared via Kaltura to be available in a Canvas Course | ✔ | ✘ | ✔ |
| Are available to publish directly in an associated Canvas course | ✘ | ✔ | ✘ |
| Are FERPA compliant to use in an associated course | ✔ 1 | ✔ | ✔ 2 |
| Are automatically closed captioned | ✔ 1 | ✔ | ✔ |
| Are available ________ | in perpetuity 1 | for 120 days | in perpetuity |
| Do not affect Canvas file limits | ✔ 1 | ✔ | ✔ |
| Can be trimmed | ✔ 1 | ✔ | ✔ |
| Can have sections cut out of the middle | ✔ 1 | ✘ | ✔ |
| Can be made available to all users in a Canvas course | ✔ 1 | ✘ 3 | ✔ 2 |
| Can be easily shared with other/future classes | ✔ 1 | ✔ 2 | ✔ 2 |
| Can be used to record breakout rooms | ✔ 4 | ✘ | ✘ |
1 via Panopto in Canvas 2 must be downloaded and shared via Panopto in Canvas 3 users must have a Cornell NetID 4 An instructor recording to a local computer can be followed into a breakout room. Participants can be allowed to record breakout rooms to their local computers.
To share a recording made to a local device, you will want to upload the recording to Panopto in the desired course.
To share recordings from the Zoom cloud in Canvas, go to Zoom –> Cloud Recordings and switch the desired recordings’ Publish switch to the right.
To share VOD recordings, you will need to visit Cornell VOD and follow the steps outlined under Accessing Your Recordings on the IT page Zoom Recording Help. Once you have downloaded the recording, use Panopto in Canvas to share it with your course.
Accessibility Tips
- Add synchronized captions to your videos. Panopto automatically generates captions for videos with dialogue, but you have to fix all spelling, punctuation, and timing errors to be accessible. See Editing Automatic Captions in Panopto.
Running a Zoom meeting will require the installation of the Zoom application on your computer. You can find the application and instructions on the IT@Cornell website. (Be sure to download and install the application well in advance in case you need IT support with the installation.)
Be sure to clearly communicate the time and function of the Zoom meeting to the students far enough in advance for them to properly prepare. Also make sure they know they will need to install Zoom on their devices before they can enter the Zoom meeting.
Live transcription during a Zoom session is available for those who are interested.
When using Pre-Assigned Breakout Rooms, If not all attendees are successfully pre-assigned, click Recreate , then Recover to Pre-Assigned Rooms .
- Within your course, click the Zoom link in the Course Navigation menu on the left.
- Click the Start button to the far right of the Zoom meeting.
- Click the Open zoom.us button in the pop-up window.
- Run the Zoom meeting. (See Host and Co-Host Controls in a Meeting for documentation on functions within Zoom. Your experience may differ slightly based on the settings you have chosen.)
- When the meeting is finished, click End Meeting at the bottom right.
- Click the End Meeting for All button that appears to the right in the pop-up window.
![]()
Students can use the chat to submit their questions or answers to you privately by clicking on your name in the chat list. This strategy would be helpful for answering and discussing controversial topics.
You can turn off the chat until you are ready to use it.
Accessibility Tips
- Enable Live Transcription to better accommodate participants.
- Verbally describe the concepts conveyed by charts, graphs, props, and other visuals as they appear in the video.
- If demonstrating a tool, do not rely on location, color, or shape when providing verbal instructions; e.g., instead of saying “click the red button”, say, “click the submit button.”
- Consider strategies for Making Zoom Sessions Inclusive.
- If you are answering questions or addressing conversations from the chat, read the questions/comments out loud.
- Encourage students to share direct links to anything they screen share and encourage them to make sure that material is accessible.
- For large classes, use the chat sparingly. Screen readers will read every chat message, which can get distracting in Zoom meetings with many attendees.
