
Zoom allows you to meet your students online when you can’t meet in person. As such, it can be used to hold virtual office hours with your students. Using Zoom and Canvas’ Scheduler tool, you can set up virtual office hours and allow students to register for office hour appointments.
Once the following steps are completed, students will be able to register for appointments through the Calendar. Share instructions for registration with your students.
Running a Zoom meeting will require the installation of the Zoom application on your computer. You can find the application and instructions on the IT@Cornell website. (Be sure to download and install the application in advance should you require the assistance of IT support with the installation.)
Important Note
The methods used in this documentation only add to a student’s calendar office hours for which they have actually signed up.
Setting up a Zoom Meeting Outside of Canvas
Setting up Office Hour Registration in Canvas
Holding Zoom Office Hours
This process takes place outside of Canvas in order to keep office hours from negatively impacting a student’s calendar in Canvas.
If you create Zoom meetings for office hours through Zoom in Canvas, all office hour sessions will appear on student calendars.
- Go to Cornell.zoom.us and click Login at the top right.
- Enter your NetID and password. (This may not be required if you are already signed into Cornell applications online.)
- Click the red Schedule a New Meeting button near the top left.
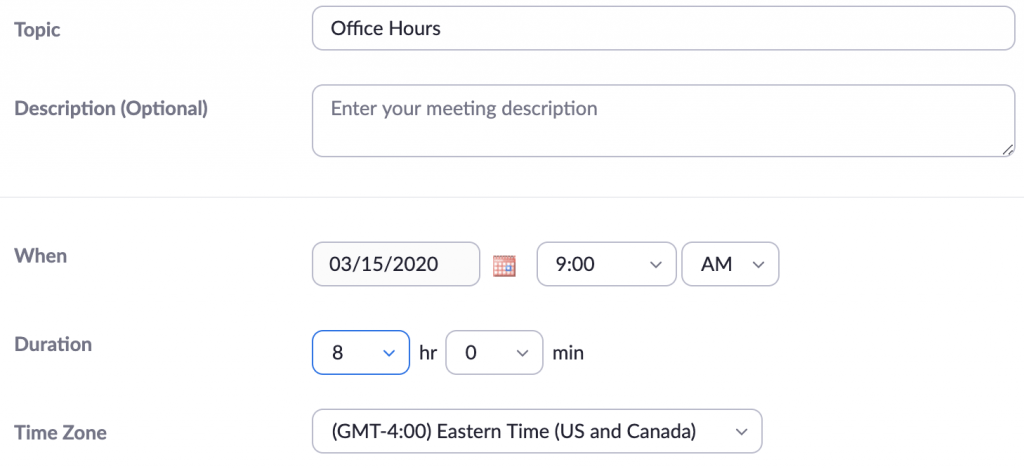
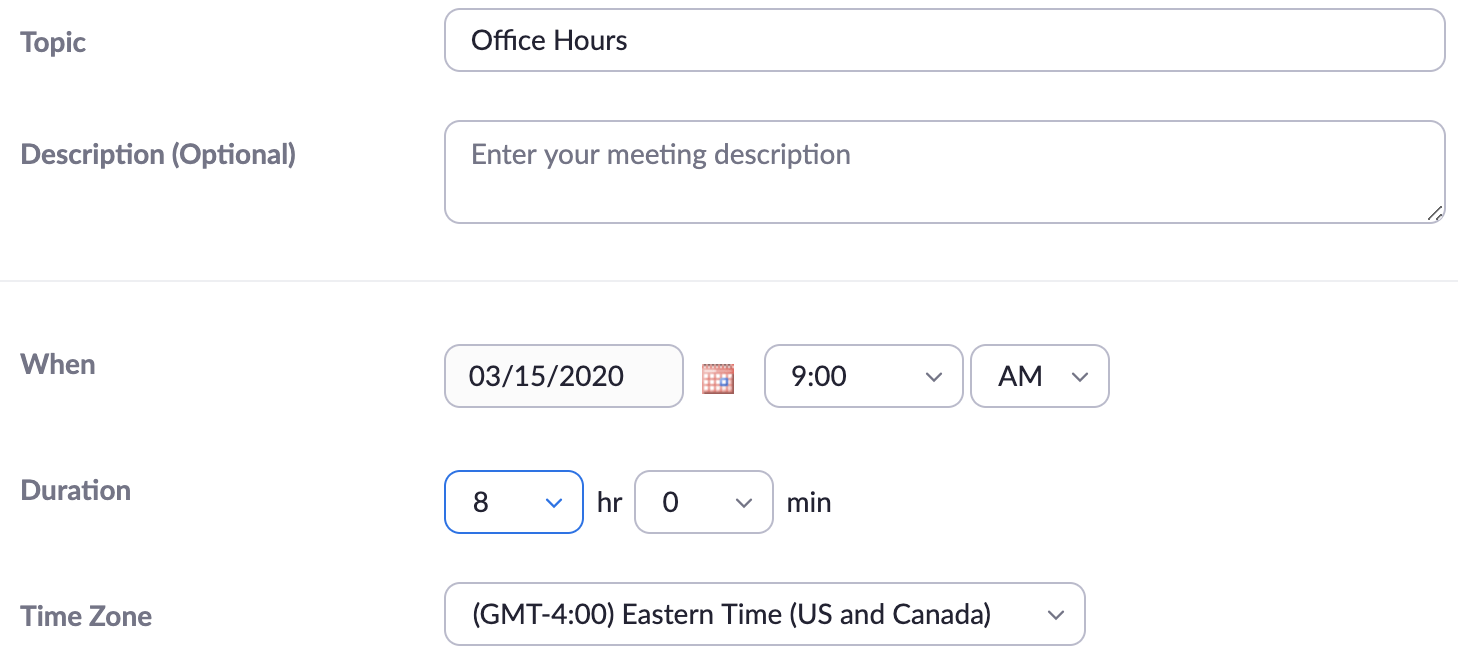
- List Office Hours or another clear, descriptive title in the box next to Topic. (You may also want to include a description, but it is not necessary.)
- Choose when to start office hours and the duration of the office hours on a given day. (It is not possible to create split hours during the same day, but you can preclude specific times during setup in the Scheduler tool. As such, it is recommended the Duration should be set to 8 hours and the start be set to 9:00 am.)
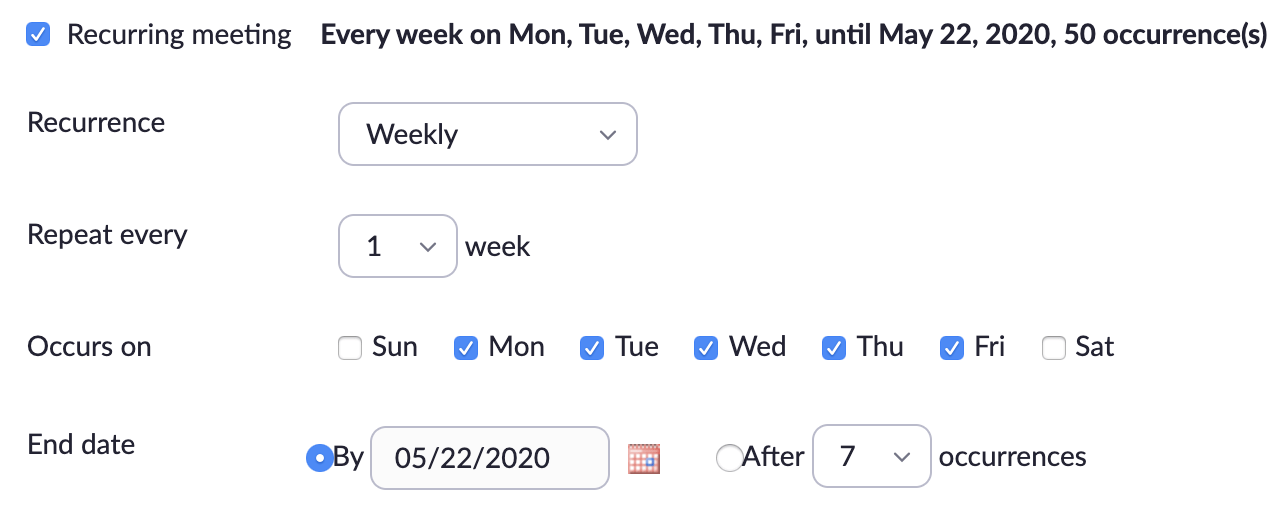
- Check the box next to Recurring Meeting.
- Select Weekly from the Recurrence dropdown menu and 1 from the Repeat every dropdown menu.
- Check the boxes next to days of the week on which you will hold office hours.
- Select an End date for the last date of office hours. (You may want to set this as the end of the semester.)
- Choose other settings as you desire, but be sure to check the box next to Enable waiting room and make sure Everyone will be sent to the waiting room. (This is crucial to keep students from crashing other students’ appointment times.)
- Click the red Save button at the bottom.
- Copy the Join URL for use with the Canvas Scheduler tool.


- In Canvas, click Calendar from the Global Navigation menu on the far left.
- Click the + button at the top right.
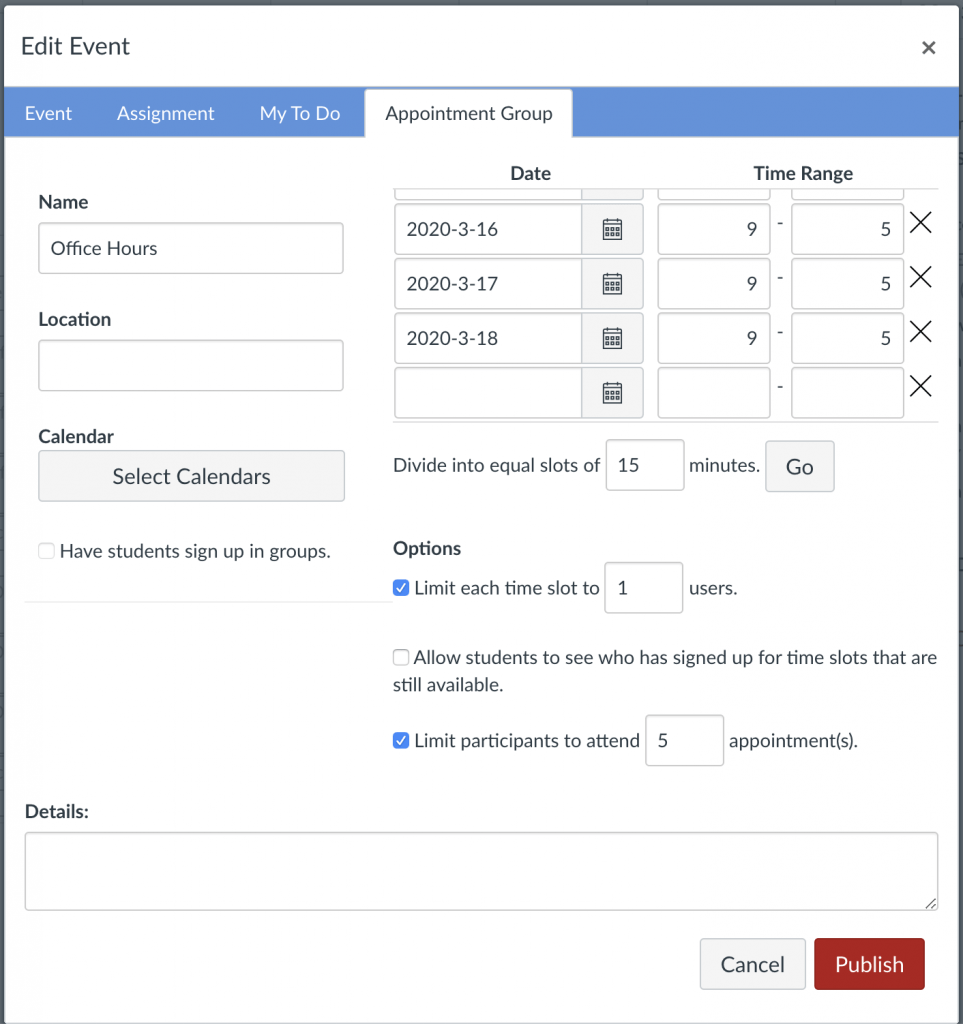
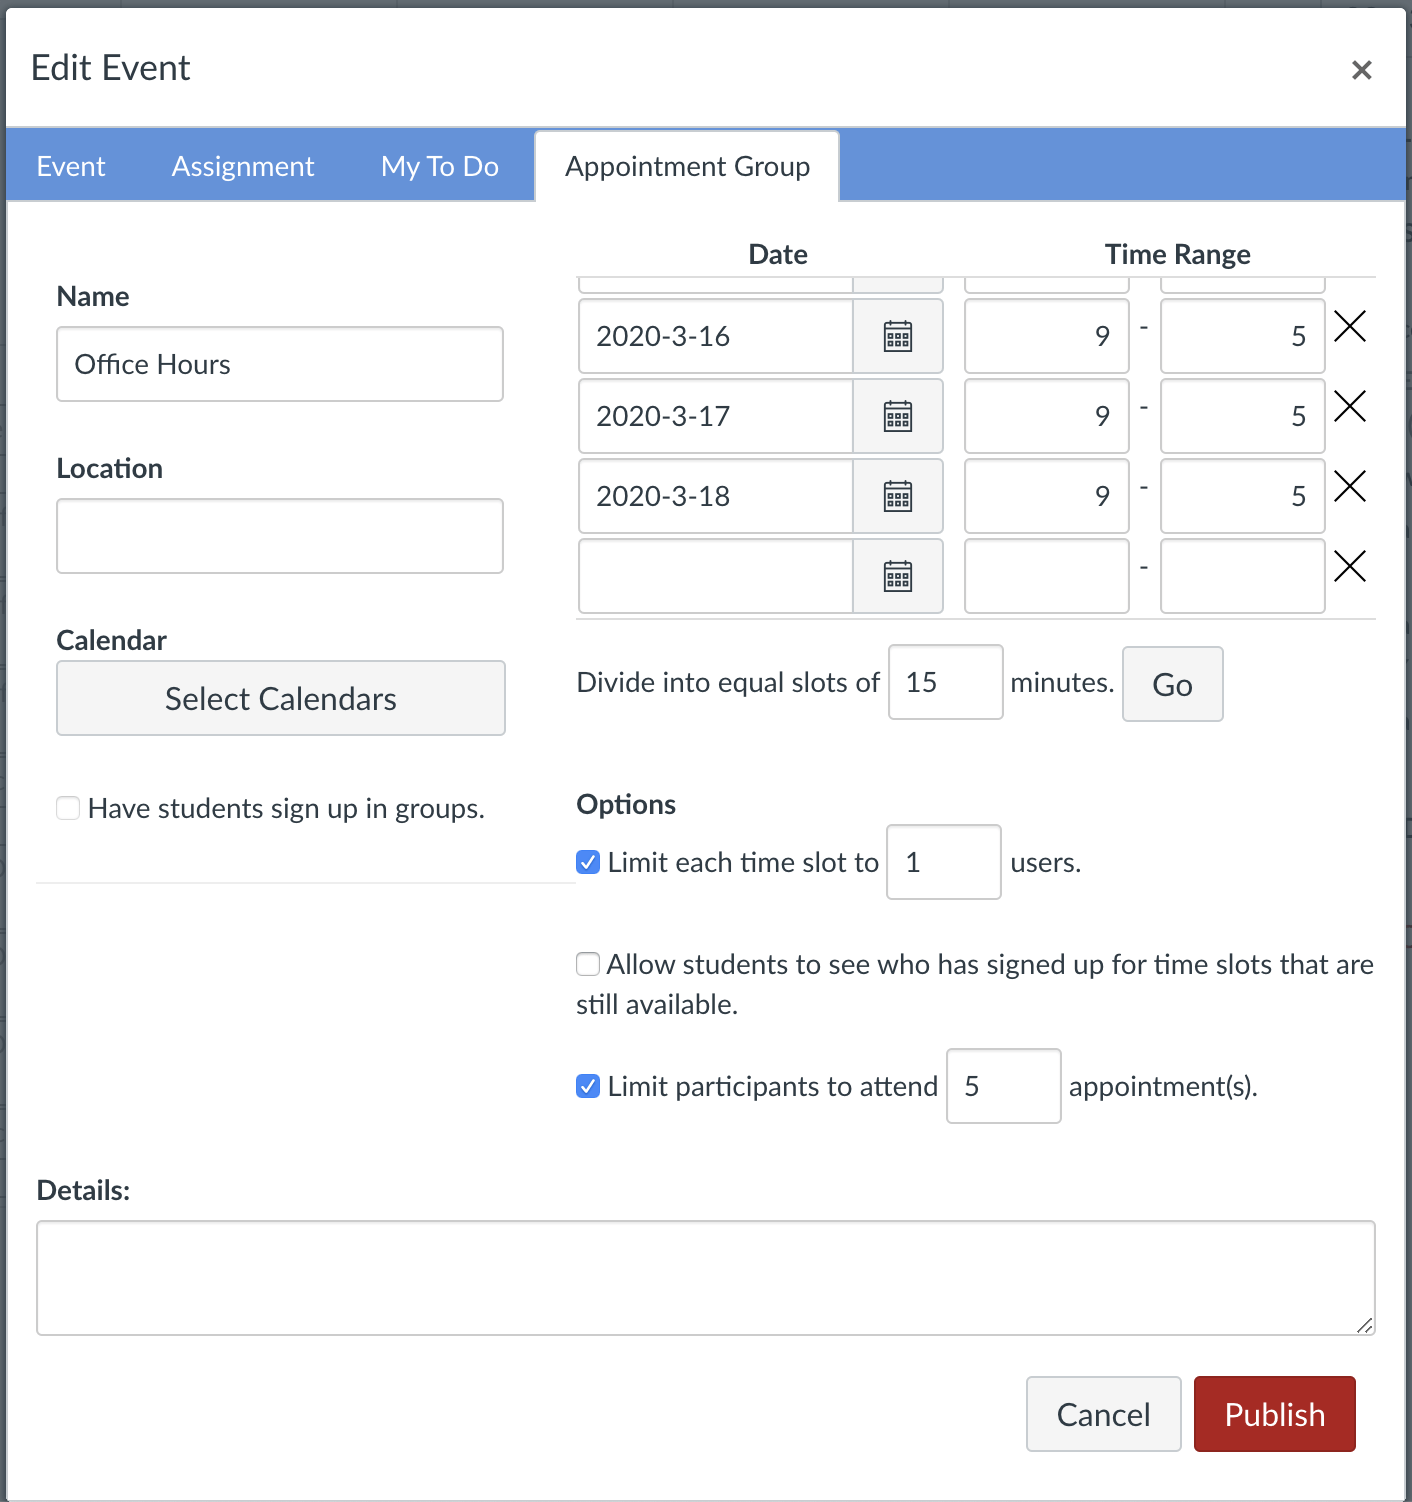
- Click the Appointment Group tab at the top right of the pop-up window.
- Enter a title in the Name box. (It’s recommended this be the same title used in the Topic box of the Zoom meeting you set up in step 4 of above.
- Enter details of the office hours (including the Zoom link you copied in step 12 above) in the Details box.
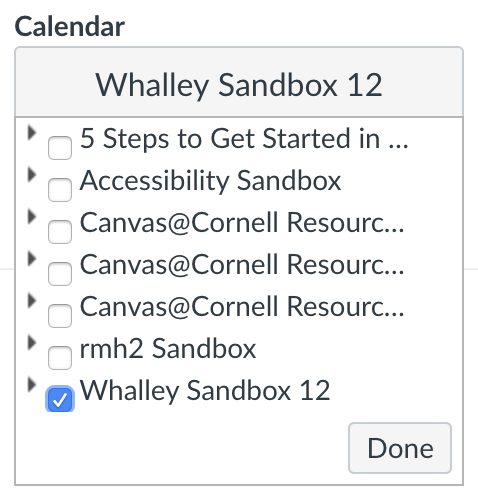
- Click the Select Calendars button, choose the course(s) from the list, and click the Done button in the course selection dropdown. (It is possible to set office hours available for multiple courses.)
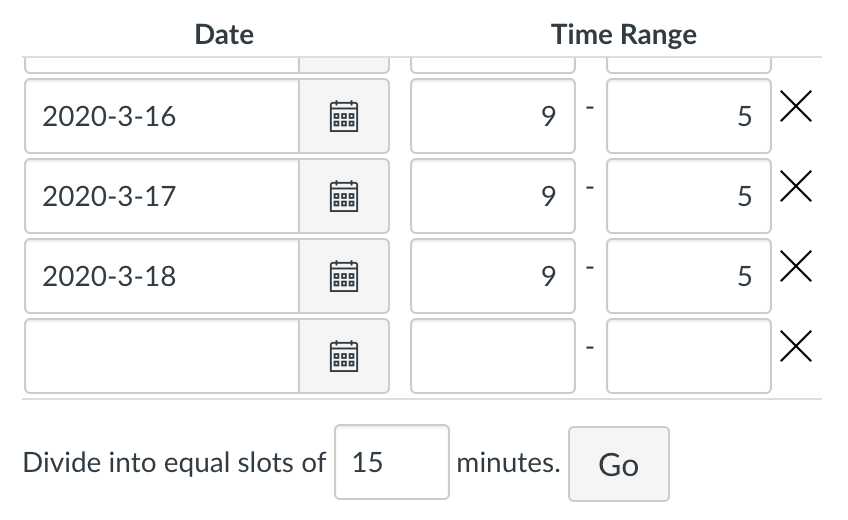
- Enter the date of the first set of office hours in the Date box. Repeat this in each Date box that appears for each day of office hours. (Unfortunately, there is not a way to set up a recurring appointment. Each day must be entered manually.)
- For the time range, you want to enter a beginning time for the earliest office hours on that date and the ending time for the end of the latest office hours for that date. (In the next step we will split that single block into smaller bookable blocks.)
- Choose how long each appointment session should be and enter the length in the box to the right of minutes and press the Go button. (This will automatically split each day listed hours. If there is a time between the starting and ending hours you aren’t offering office hours, you can click the X next to those hours to remove them from the offering.)
- Check the box to limit the number of students allowed in each time slot. Enter a limit in the box next to users. (Limiting to 1 user is recommended unless these will be group appointments.
- Set the other settings as desired and click the red Publish button on the bottom right.
In order to maintain privacy for quarantined/isolated students, DO NOT select Allow students to see who has signed up for time slots that are still available.
- Go to Cornell.zoom.us and click Login at the top right.
- Click the Start button to the far right of the office hours you are about to hold.
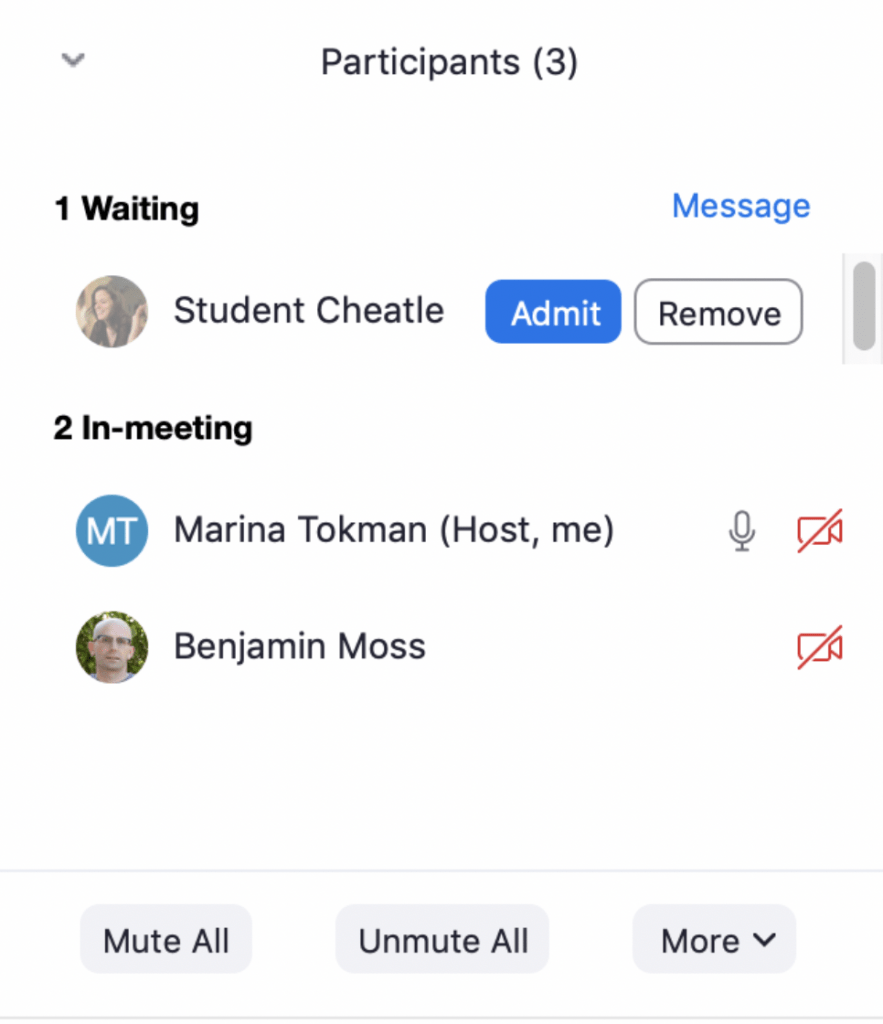
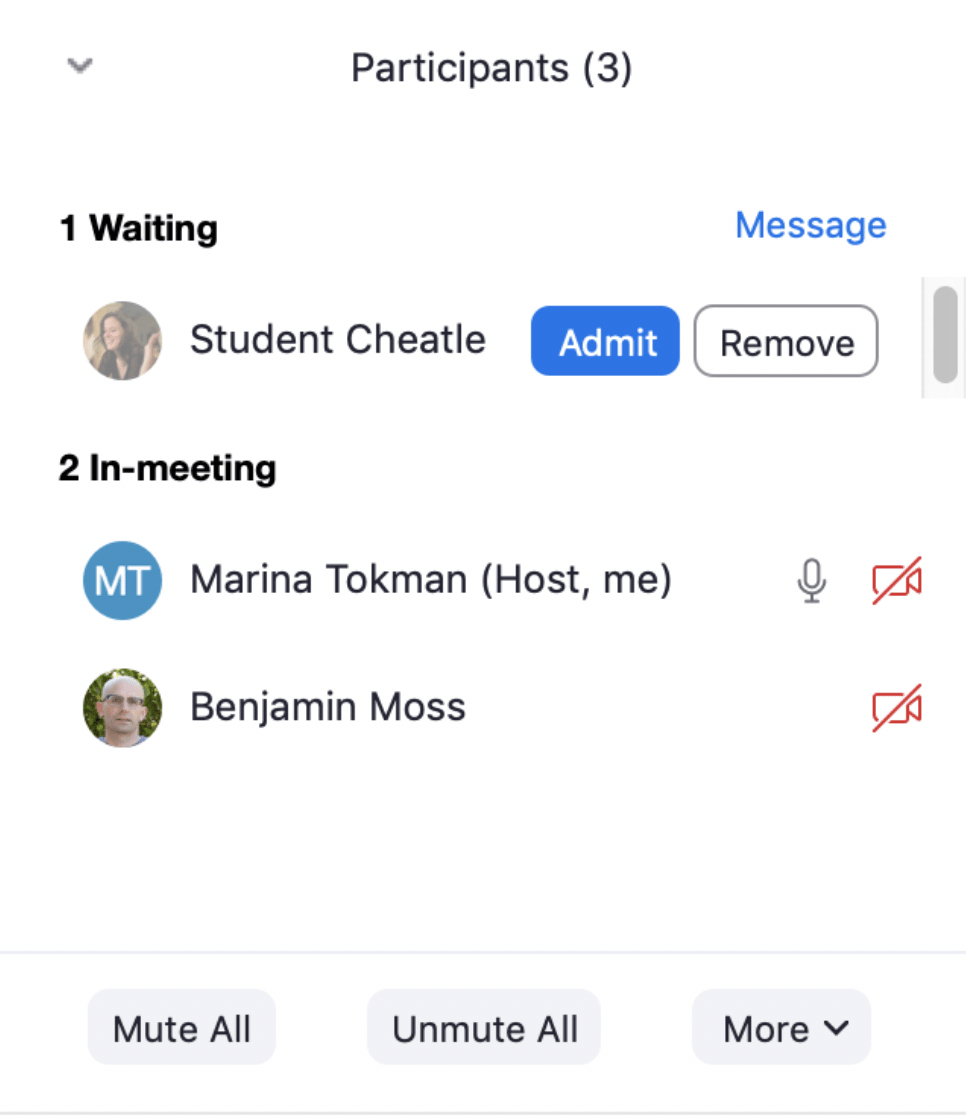
- Choose which students to admit into the meeting from the waiting room by clicking the blue Admit button to the right of the student’s name on the top right. (While in the waiting room, students will see the message “Please wait, the meeting host will let you in soon.”)
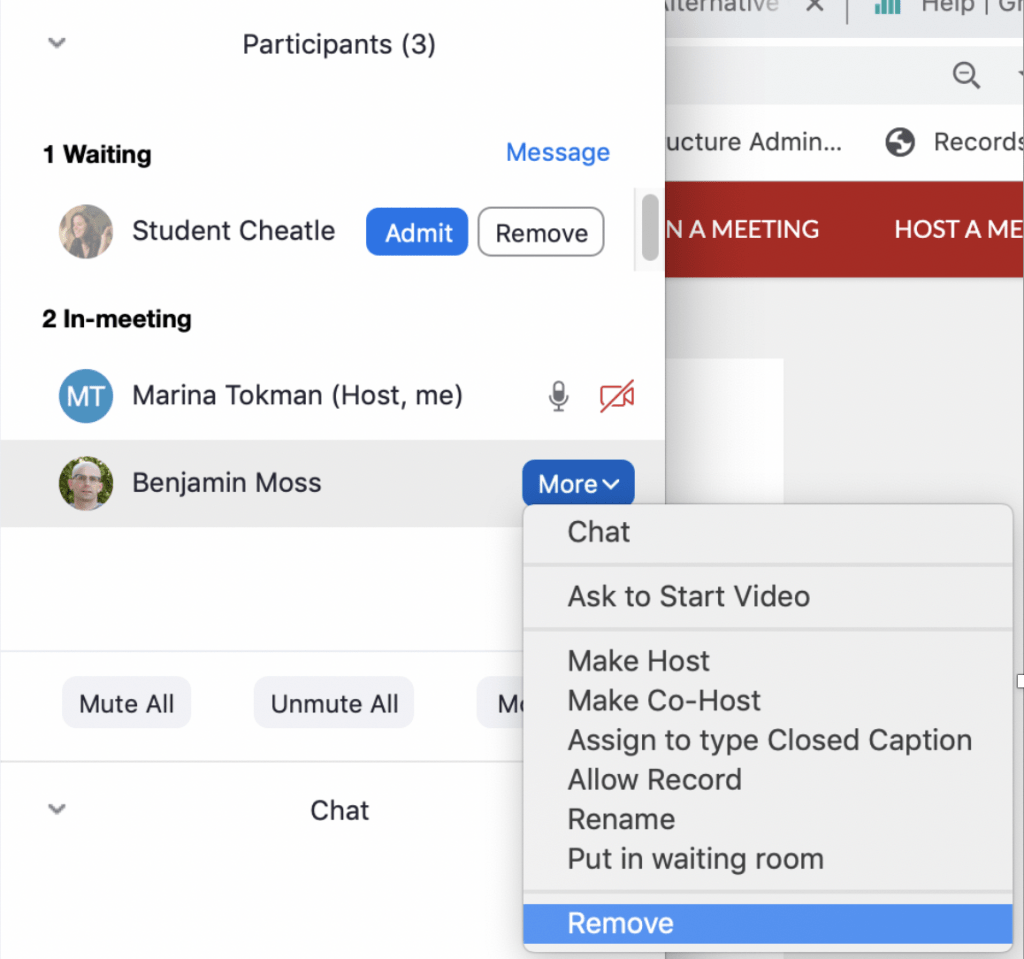
- To remove a student before admitting another student, click the blue More button to the right of the student’s name and select Remove or Put in waiting room.
- When you are finished with your meeting, click on End Meeting at the bottom right of your tool bar. You will then have an option to end the meeting for everyone, or just for yourself.
